Centos 7部署Zabbix 5的傻瓜式指南
实验环境:
服务器操作系统版本:
[root@host-137 ~]# cat /etc/redhat-release
CentOS Linux release 7.7.1908 (Core)
关闭防火墙
systemctl stop firewalld
开机禁用防火墙自启
systemctl disable firewalld
设置临时关闭selinux
setenforce 0
设置永久关闭selinux
vim /etc/sysconfig/selinux
将第7行内容修改如下

修改完成之后使用 reboot 命令重启服务器即可开始zabbix的安装
1. zabbix官方网站选择zabbix版本和系统版本查看参考文档
官网地址>> https://www.zabbix.com/download
2. 安装官网的zabbix源并替换为阿里云的zabbix源
2.1 安装官方的zabbix源
rpm -Uvh https://repo.zabbix.com/zabbix/5.0/rhel/7/x86_64/zabbix-release-5.0-1.el7.noarch.rpm
2.2 删除官方的zabbix源
rm -f /etc/yum.repos.d/zabbix.repo
2.3 上传阿里云的zabbix源到到 /etc/yum.repos.d 目录下
查看上传成功
[root@host-136 ~]# ll /etc/yum.repos.d/zabbix_Aliyun5.0.repo
-rw-r--r--. 1 root root 893 Jan 21 22:21 /etc/yum.repos.d/zabbix_Aliyun5.0.repo
2.4 zabbix源名称为 zabbix_Aliyun5.0.repo
内容为:
[zabbix]
name=Zabbix Official Repository - $basearch
baseurl=http://mirrors.aliyun.com/zabbix/zabbix/5.0/rhel/7/$basearch/
enabled=1
gpgcheck=1
gpgkey=file:///etc/pki/rpm-gpg/RPM-GPG-KEY-ZABBIX-A14FE591

[zabbix-frontend]
name=Zabbix Official Repository frontend - $basearch
baseurl=http://mirrors.aliyun.com/zabbix/zabbix/5.0/rhel/7/$basearch/frontend
enabled=1
gpgcheck=1
gpgkey=file:///etc/pki/rpm-gpg/RPM-GPG-KEY-ZABBIX-A14FE591

[zabbix-debuginfo]
name=Zabbix Official Repository debuginfo - $basearch
baseurl=http://mirrors.aliyun.com/zabbix/zabbix/5.0/rhel/7/$basearch/debuginfo/
enabled=0
gpgkey=file:///etc/pki/rpm-gpg/RPM-GPG-KEY-ZABBIX-A14FE591
gpgcheck=1

[zabbix-non-supported]
name=Zabbix Official Repository non-supported - $basearch
baseurl=http://mirrors.aliyun.com/zabbix/non-supported/rhel/7/$basearch/
enabled=1
gpgkey=file:///etc/pki/rpm-gpg/RPM-GPG-KEY-ZABBIX
gpgcheck=1
3. 安装zabbix所需组件
3.1 zabbix-server和代理
yum install -y zabbix-server-mysql zabbix-agent
3.2 Enable Red Hat Software Collections
yum -y install centos-release-scl
3.3 安装zabbix前段所需依赖包
yum -y install zabbix-web-mysql-scl zabbix-nginx-conf-scl
4. 数据库的安装和配置
4.1 安装数据库
yum -y install mariadb mariadb-server
4.2 启动数据库
systemctl start mariadb
4.3 进入数据库并配置
[root@host-136 ~]# mysql
Welcome to the MariaDB monitor.  Commands end with ; or \g.
Your MariaDB connection id is 2
Server version: 5.5.68-MariaDB MariaDB Server

Copyright (c) 2000, 2018, Oracle, MariaDB Corporation Ab and others.

Type 'help;' or '\h' for help. Type '\c' to clear the current input statement.
# 创建zabbix数据库
MariaDB [(none)]> create database zabbix character set utf8 collate utf8_bin;
Query OK, 1 row affected (0.00 sec)
# 创建zabbix用户
MariaDB [(none)]> create user zabbix@localhost identified by 'zabbix';
Query OK, 0 rows affected (0.00 sec)
#给zabbix用户授权
MariaDB [(none)]>  grant all privileges on zabbix.* to zabbix@localhost;
Query OK, 0 rows affected (0.00 sec)
#完成退出
MariaDB [(none)]> exit
Bye
4.4 导入zabbix数据库
zcat /usr/share/doc/zabbix-server-mysql*/create.sql.gz | mysql -uzabbix -pzabbix -Dzabbix
5. 修改zabbix-server的配置文件
vim /etc/zabbix/zabbix_server.conf
将124行内容修改如下
6. 修改php-fpm的配置文件
vim /etc/opt/rh/rh-php72/php-fpm.d/zabbix.conf
将2、3行内容修改如下
配置时区
7. 修改nginx配置文件
vim /etc/opt/rh/rh-nginx116/nginx/conf.d/zabbix.conf
将2、3行内容修改如下
server_name 为所在主机的IP地址
将32行内容注释掉,并新增33行内容如下
8. 修改PHP配置文件
vim /etc/opt/rh/rh-php72/php.ini
修改以下4处内容
9. 重启所有服务并设为开机自启
systemctl restart zabbix-server zabbix-agent rh-nginx116-nginx rh-php72-php-fpm
systemctl enable zabbix-server zabbix-agent rh-nginx116-nginx rh-php72-php-fpm
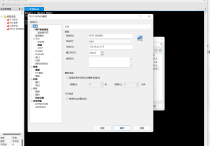
10. 浏览器输入 IP/index.php 配置zabbix
10.1
10.2
10.3 连数据库的密码为 4.3 中创建zabbix用户时设定的密码,本实验为:zabbix
10.4
10.5
10.6
10.7 用户名默认为 Admin,密码默认为 zabbix
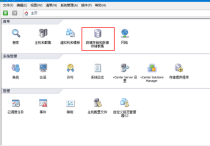
10.8 成功访问zabbix界面
10.9 汉化:
1)
2)
汉化成功
10.10 解决中文乱码问题
1)在zabbix-server服务器上安装如下文件符集
yum -y install wqy-microhei-fonts
2)然后替换linux上默认的字符集
cp /usr/share/fonts/wqy-microhei/wqy-microhei.ttc /usr/share/fonts/dejavu/DejaVuSans.ttf
3)出现覆盖询问时输入 y 回车即可
[root@host-137 ~]# cp /usr/share/fonts/wqy-microhei/wqy-microhei.ttc /usr/share/fonts/dejavu/DejaVuSans.ttf
cp: overwrite ‘/usr/share/fonts/dejavu/DejaVuSans.ttf’? y
[root@host-137 ~]#
4)查看效果,乱码问题成功解决